If you didn't see my previous blog on Kombucha 101 - you may want to check-it-out prior to trying to follow this post.
Things you will need to start your Kombucha the way we are making it:
- 1/2 Cup Kombucha Starter (you can get this at your local health food store. Just pick up any bottle of kombucha that you see chunky / slimies floating in - make sure it is unpasteurized)
- 2 qt. boiled filtered water
- 1 Cup organic cane sugar (didn't have this so we used regular)
- 4 qt. filtered water (room temp)
- 2-4 tea bags depending on strength of tea
So today we start our 2nd day of Let's Make Kombucha. First we needed 2 quarts of filtered water brought to boil. (so right off the bat we had opportunity to re-visit conversion)
After the water was brought to a boil we put it back into the glass measuring bowl to add the sugar.
So in it goes... 1 Cup O' Sugar.
Stir until sugar is dissolved.
Next it is time to get the lovely little tea bags a brewing in it. We have a girl (middle daughter 19 yrs old) in our house who has a bit of a tea addiction. Our local tea house knows her well by now. So we always have an eclectic variety of teas in adorable glass jars. After some official sniff-testing we decided (against common Kombucha suggestions) to use a white blueberry tea (they say to use green or black). We did toss in a plain old bag of black tea to the mix. Just in case there is a scientific reason for one of the two types suggested.
We put in 3 bags of the white tea and 1 black tea bag to steep in the hot sugar water mixture.
For this phase you leave the tea seeping until the water cools - approx 15-20 minutes.
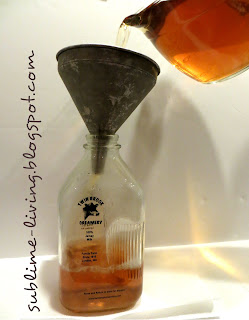
Once the water has come close to room temperature it is time to add 4 more quarts of filtered water to the tea mix. Now comes the time to toss it all together in a BIG glass jar.
add the Kombucha Starter: How much will depend on the weather in your zone and the temperature in your house. It needs to stay at a minimum of 65 degrees. If your home is on the cooler side you will need more kombucha starter - if it is on the warmer side start with a little under 1/2 cup.
We tossed in all we were given in this batch. 1 - it is winter and stinking cold. 2- it is winter and we live in a house with a REALLY BAD draft problem - so it is stinking cold. We didn't measure it but I would guess we had between 2/3 & 3/4 cup of the starter kombucha.
Now you are ready to add a few layers of cheesecloth over the top and secure it tightly with a rubber band....and now you wait. They say if you started with a mature scoby that you would have a completed batch in 12-14 days. However since we started with a batch of starter without the scoby we will see just how long it takes. Can't wait to see the growing little slime fest happening in our concoction. Photos to come as they develop.
NOTE} You may notice this glass jar has a small opening. This IS NOT a good idea. Once the scoby grows it will be trapped inside the bottle with no chance of harvesting it to multiply. We started the project while one of our eldest daughters was running to get the LARGE wide mouth glass jar. Guess what? Yep - no one had it. They were out of stock at the two store where they usually carry them. This particular batch is going to take quite a long time to grow so as it is in slow-start mode we have time to get the proper container. We will post a picture when we finally have our little hands on it.


No comments:
Post a Comment