Showing posts with label BEST. Show all posts

Saturday, April 3, 2021

Family Dinner Favorite: Delicious Keto / Paleo Cauliflower Noodle Lasagna Recipe


Oh YUM cauliflower, you transform into absolute low-carb deliciousness.   I tell you - I whipped out a pan of this lasagna and my clan (which only consisted of four on this particular night) cleaned the entire dish. They had NO IDEA what the noodles were made of. They could tell they were different - but they really liked it. 


If you are making up your own sauce - start that first so it can be simmering to perfection while the noodles are being created. If you are looking for a yummy Paleo Tomato Sauce  Rao's is an excellent option.


SAUCE: 
  • Rao's Tomato sauce  15oz jar
  • 1 lb ground Italian Sausage
  • 1/2 yellow onion chopped
  • 1/2 green bell pepper chopped
  • 3 cloves garlic minced
  • 1 teaspoon dried oregano
  • salt/pepper to taste
I  browned Italian sausage, then added sauteed onion, green bell pepper until soft, added some minced garlic, oregano, salt & pepper, then add sauce. 

Next you will want to make the cauliflower lasagna noodles. These are so simple and yummy. I found this TERRIFIC recipe on The Iron You Blog. He has an entire recipe consisting of a delicious bolognese and bechamel sauce. This time around I just stuck with his noodle recipe. YUM! Trust me, I will be returning to try the other options. 

NOODLES:
{Just requires cauliflower, eggs, salt & pepper - Parchment Paper} click link above for the recipe and directions.

OTHER INGREDIENTS:
  • 1 C. Grated Parmigiano Reggiano
  • 1 C. Shredded Mozzarella
  • 1-2 Cups Baby Spinach


I layered a cup of sauce in the bottom of the pan, then added a layer of noodles, topped with more sauce, some spinach, sprinkled Parmesan cheese...repeat noodles, sauce, spinach, parm and final layer was noodles, sauce, parmesan and mozza sprinkled over top. 

Bake at 325 degrees for about 30 minutes or until cheese is melted and bubbly. 


-Simply Sublime

Wednesday, November 26, 2014

Making a Custom Gingerbread House from Scratch: Elf Movie Theme

If you have been around this blog very long, you have heard about our wacky group of moms and kids that get together once a week at our Homeschool Co-op. At the end of each quarter our motley crew has a celebration of sorts. The themes have a wide range from crazy to cozy but all manage to stay grounded in the element of a rootin' good time.  You may recall last year a couple friends joined me in planning the Redneck Hootenanny end of quarter party {that has since become the #1 blog post favorite}. This year it was a Christmas Party Extravaganza - gingerbread house contest, gift exchange and good grub included! SO.MUCH.FUN.

Well, give us a craft challenge and we will jiggety jump. It had been two years since our last gingerbread creation and we needed some inspiration to get our creative juices flowing freely. A suggestion of all thing ELF was made by the dear hub and we were bursting with ideas. 

First, we needed to create a model of what we would be building. I grabbed an old, used (yes Mr. Postman,,, I didn't break a federal law... it was used and headed to recycling) box and formed the buildings and a liner to fit within my tray base. The kids and I talked about where things should go and what parts of the movie we felt was most important to present in the small space we were limited with. I drew a very primitive plot plan.

Next we whipped up the gingerbread dough. I wanted to make a gingerbread that would be hard enough for the buildings but yummy enough to eat the scraps. I decided on a recipe that was once used (may still be) at the White House. Here is the recipe for the White House Gingerbread Recipe.

It was originally published in Mailbox News (a cake decorating magazine), and is the actual White House gingerbread house recipe used by then White House Pastry Chef Hans Raffert.
We rolled out the dough and disassembled our cardboard to use as patterns. Baked them - and trimmed to sharp edges while the building pieces were still on the baking pan (before they had a chance to cool). 

Turned out great! 


Then it came time to figure out the glue. I decided to go with the basic royal icing recipe that comes on the Wilton's Meringue Powder tub. I made a double batch.


Got my pastry tubes filled with the proper decorator tips and we got to work assembling.  Then, we let the building set for a day before embellishing with sweet goodness.


Needless to say - we finished so far ahead of time, we just kept adding more day, by day. The signage ended up being my favorite addition.

As we probably all know, Elf starts at the North Pole and passes Narwhal on his way to the Candy Cane Forest, on to the Sea of Swirly Twirly Gumdrops and through the Lincoln Tunnel. Arriving in New York he seeks his Dad out at Gimbels Dept. Store, Spins in the rotating doors (different building but we added it to Gimbels) and discovers the Worlds Best Cup of Coffee.  His route was marked by some sweet tart candy stepping stones throughout the whole scene we created.

We had such a blast! Everyone was able to contribute and feel proud with the end result of our combined efforts. The great news is we have a month to appreciate this labor of love.

Oh, and we did win the competition. ;)


I wish I would have thought of doing this last year for our Family Christmas Countdown Party Series: Elf Movie Night! 


 -Simply Sublime

Sunday, October 26, 2014

Salted Caramel Apple Pie Slab Recipe with Perfectly Rustic Pie Crust


So, the other day I got a call from my newly married, precious, daughter and her hubby. They wondered if we might join them for an outing to one of our local apple farms. Just happened I had a Groupon waiting to be used for U-pick apples, that paired with two kiddos dying for an excuse to close the books and hit the road for a little fieldtrip made for a no-excuse-in-the-world-can-stop-us-from-going attitude. 


After a spot of lunch in the Cafe we put our soles to the gravel road leading out to the orchard. It was a beautiful walk that spurred a lot of conversation. AND with Nate I do mean, A LOT! The boy has much to say and ask, okay? 


Plucking the PERFECT apples off the trees was so much fun.


So, what do you do with deliciously fresh picked apples, or any apples for that matter? Bake them into something divine of course!


So, Apple Slab Pie it is. 

A few weeks ago I posted a recipe for my Mother-in-laws WORLDS BEST Pie Crust Recipe in my Grandma's Apple Dumpling Recipe. It makes a mean pie crust, I mean MEAN like flakiest pie crust I have probably ever inhaled. So very, very tasty. However, I knew for a Pie Slab I would need a less delicate crust that could allow for a bit more handling without breaking down.

In my searches for the best pie crust over the years, I have seen a few recipes that included egg and vinegar. So, I decided to try out the Pioneer Woman's Perfect Pie Crust. Only, I knew for my slab creation I would need to make a slight alteration... BUTTER. Yes, butter. These ALL shortening crusts just leave me longing for that deep, rich golden butter flavor that can't be matched with imitation flavoring. I also was looking to increase the density of the dough that would give me a rich, rustic crust. 

Perfectly Rustic Pie Crust
  • 1 cup Crisco (butter flavored vegetable Shortening)
  • .5 cup Butter
  • 3 cups All-purpose Floure
  • 1 teaspoon salt
  • 1 whole Egg
  • 5 Tablespoons Cold Water
  • 1 Tablespoon White Vinegar

SIFT flour and salt into a large bowl.  With a pastry cutter, gradually work the Crisco & butter into the flour for about 3 or 4 minutes until it resembles a coarse meal. In a small bowl, beat an egg with a fork and then pour it into the flour/shortening mixture. Sprinkle in 5 tablespoons of ice-cold water & 1 tablespoon of white vinegar mixed together. Use a fork to gently work small areas of the dough together until it can form a ball. Don't work it too much, or dough will become tough.

Roll out your dough sandwiched between waxed paper that is slightly floured (the wax paper reduces the need for so much flour and leaves you with a more tender crust) sprinkle flour on top and bottom of dough to prevent sticking.

Roll out 2 pieces of dough to a little larger shape than the dish you will be using to bake your slab. Make the dough as think or thin as you prefer. I really like a thick crust - so I typically have my dough at 1/8-1/4" thick.

{If you want to freeze this dough for future use - just make disc shapes with dough, bag and freeze.}

Pie Filling

You can fill your pie slab with just about anything. On this one I used my typical apple pie / dumpling filling recipe.{Which I just make up by eye} I peeled, cored and sliced 4 apples, Added 1 cup of sugar, a couple teaspoons of cinnamon, and .25 cups of flour for thickening. Then drizzled with my homemade Salted Caramel Sauce over the top of the apples once they were layered over the bottom slab of dough that I had placed on the stoneware pan I was using. 

Once you have the bottom dough in place on your baking dish, have it topped with your filling (with at least an inch in from the edges of the dough) - and layered your top crust on, it is time to tuck, roll and press your dough edges around the perimeter of your slab. Now, hear me on this - it isn't supposed to be pretty. What makes this so delightfully appealing to the eyes and tastebuds is the rustic-ness of it; hearty, crusty yet flaky. This is the kind of dessert you can just dig right into and devour. Not to be confused with those intricately designed desserts that are delicate and must be oh-so, politely eaten.  Nope - devour this people. This is good grub - grab n' go. 

Toss it in the oven at 375 degrees for about 30-45 minutes - until golden. I put a cookie sheet down on the rack below - in case any drippings escaped. 


-Simply Sublime

Thursday, September 25, 2014

Grandma's Old Fashioned Apple Dumpling Recipe: Seriously BEST Fall Dessert Ever


Okay, I know I have said BEST EVER, on a few of my recipes. This, however, should be labeled under my BEST EVER, all-time FAVORITE, can't pass through fall without making it, family roots, recipe. 

I simply cannot remember a single fall season of my life that didn't contain a batch of apple dumplings. If it wasn't my Grandma whipping some out, it would be my Aunt, or my Mom. Our family doesn't have a lot of recipes that have lasted through the generations, as we are a creative cooking family that enjoys trying the new. These dumplings have yet to be knocked out of our #1 dessert placement. Nothing can beat 'em, I tell ya!


So this recipe is not super precise one (outside of DO NOT DEVIATE from granny Smith). Depending on how juicy the apples are, how tart the apples are, will depend upon the quantity of sugar and spices. It's all to the taste...which isn't a bad thing...it leads to lots of tasting along the way of preparation. If you like thick crust, thin crust...it's up to you. BIG dumplings, small dumplings... up to you. Nutmeg...no nutmeg...again, up to you! :) 


Now, for a note on the pie crust used in this recipe. I have recently converted from the traditional, classic: Betty Crocker Recipe Crust,  to a new flakier, more flavorful, version. Let me give you a little morsel of insight here - there is an ingredient that makes me cringe a little BUT I guarantee you, it is worth the try.  I am absolutely NOT a fan of Crisco. Pretty much, like really, dislike it. Add any kind of artificial flavoring to it...like butter - UGH - no way. BUT hear me out... {GULP}... listen closely and quickly... this is the ONLY place I believe you will EVER hear me say it. Butter Flavor Crisco simply makes the BEST Pie Crust. A specialty pie maker shared her secret recipe and you guys are getting it here. I am pretty sure you will end up thanking me! 


Our family finds great joy gathering around the kitchen making the apple dumplings. Okay, to be honest, we enjoy eating them MUCH MORE! We have so many dumpling-filled memories swirling through our minds. Call us the Apple Dumpling Gang. 

I hope you enjoy our family recipe as much as we do. 


Grandma's Apple Dumplings: 
Best EVER (and I mean it)

Ingredients
  • recipe Granny Smith Apples
  • 2 Cups Sugar
  • 2-3 teaspoons Cinnamon
  • Dash Nutmeg (optional)
  • 3Cups + 1/4 Cup Flour
  • 2-2/3 Cup Lard
  • 2/3 Cup Ice Water
  • 1/4 Cup Butter
  • Wax Paper
Cooking Directions
Preheat Oven to 375 degrees
Dumpling Filling:
  1. Peel, core & chop apples. Place chopped apples in a large bowl - add sugar & cinnamon (to your taste),(nutmeg if desired) add 1/4 C. flour to the apples mixture to thicken. When well mixed, set Aside.
Pie Crust: (you can use store bought - or your own version, if you must. BUT this recipe is the BOMB.COM...FLAKIEST Pie Crust EVER)
  1. Sift Flour and salt into a large bowl, add lard Using pastry cutter, combine flour and Crisco until pea-sized or smaller. Add water by sprinkling a little at a time into one area and gently mixing with fork - work about a 2-3" area at a time until all of the flour is moistened and can be formed into 4 balls of dough.
  2. Dampen your working service lightly and place a sheet of wax paper down (this will be your rolling mat) the slight moisture suctions the wax paper to the counter) dust wax paper with flour and place on dough ball on it - sprinkle dough with flour, flatten down slightly and place another sheet of wax paper over top. Roll from the center out until the dough is 1/8-1/4" thick. Cut it into quarters (4 pieces) Scoop about 2/3 C. apple mixture into the center of each piece of pie crust (do one at a time) and wrap dough around, crimping and pressing dough firmly to seal at base. place sealed side down in a pie dish. Repeat until all pie crust has been filled.
  3. You should have 2 pie pans with 8 dumplings in each.
  4. Now, dab butter on the top of each dumpling. sprinkle with cinnamon and sugar, if you would like. Now, here is the trick. Yo won't want to miss this step - this sets these dumplings into the top category. Take the apple/cinnamon juice left in the bottom of the bowl and pour over the dumplings in the two pans. Now, if the left over juice filled the pan half way up with liquid you are good to go... if not half way up the side of the pan... then add water to cover bottom half of the dumplings. Then VOILA....they are ready to go in the oven on the middle racks.
  5. Bake for approx 35-45 minutes. Until golden brown and filling is nice and gooey, and added water has become a gooey, cinnamony, delight!


-Simply Sublime

Friday, September 19, 2014

Delicious Cinna-YUM Cinnamon Roll Recipe


These cinnamon rolls by The Pioneer Woman are the bomb! So many recipes take hours and hours to prepare. These you can get into the oven in a little over an hour. They combine the regular l-o-n-g method with the quick time method adding baking soda and baking powder for a quicker rise time.

After they bake there is a DELICIOUS glaze infused with maple and coffee to top the rolls with. I get over-sweeted , so I used about half of the glaze suggested in the recipe. The photo below is from the Pioneer Woman's site - as you can see her frosting is MUCH thicker.


and here is the link to The Pioneer Woman's Cinnamon Roll Recipe along with photos and instructions. She does such a fabulous job blogging her food shares! I recommend that you spend hours and hours perusing her blog. She is amazing.

-Simply Sublime

Wednesday, September 10, 2014

Whiskey Crab Soup Recipe: A Pacific NW Soup to Die For


So, it all began with our first "FORMAL" date at the Cliff House Restaurant (which has now closed) in Bellingham, WA, almost 25 years ago. It was the beginning of a BEAUTIFUL thing... a love relationship with a steamy, creamy cup of Whiskey Crab Soup. That kind of soup you crave for weeks after you have just a taste of it.

In the almost 25 years that Dave and I have been together, this is the first time I have whipped up a batch of this scrumptious soup. Don't ask me why, I have no idea. Maybe because we can't stop ourselves from gobbling down the crab as fast as we bring it home. However, this crab season we have been blessed with an abundance of fresh Dungeness crab. So much so, that we even had to freeze some (gasp). The frozen crab will be perfect for future batches of this soup.

I didn't add the garnishing options on this recipe but you could use croutons, fresh herbs, pumpkin seeds, chives, green onions, a sprinkle of paprika, and drizzle of oil. 

Here is the recipe for easy viewing: 

Whisky Crab Soup

Courtesy of The Cliff House - Bellingham, WA


Ingredients

8 cups water 

1/4 cup fish base (or 4 cubes fish boullion) 

3/4 cup butter 

1 1/4 cup flour 

1 1/2 cup Red Sauce (see ingredients below) 

2 +/- tsp. Old Bay Seasoning 

1 tsp. white pepper 

1/4 cup lemon juice 

2 1/2 tsp. Worcestershire sauce 

2 tsp. Tabasco sauce 1 1/4 cup lump crab meat 

2 cups heavy whipping cream 

1 cup whole milk 

1 oz. sherry 

1 oz. whiskey 


Red sauce ingredients 

1/4 cup olive oil 

2 cups shredded carrots 

1 T. minced garlic 

1 T. dried basil 

1 cup chopped red onions 

3  28 oz cans diced tomatoes 


Red Sauce Instructions: (make in advance) 

Cook oil, carrots, garlic and basil over high heat, stirring occasionally, until tender; 5-10 minutes. 

Add onions and reduce heat to medium. 

Cook until very tender; about 15 minutes. 


Add tomatoes and cook for 20-30 minutes over high heat, stirring often. Remove from heat and let cool. Puree and chill. Note: This makes 4-5 cups of red sauce. Freeze excess in pre-measured Ziplock bags for future batches of soup. 


Soup instructions:

Bring water and fish base to a boil. Meanwhile, make a roux with the flour and butter. To make the roux, start by melting the butter in a heavy-bottom saucepan until it foams and bubbles. Add the flour all at once, whisking constantly until the two are combined and a smooth consistency has formed. Cook the mixture for about 5 minutes. At this point, the roux will develop a light brown hue and a nutty flavor; this will be used to thicken the soup. 


Add roux to boiling stock. Whisk well over high heat until roux is completely incorporated and the mixture is smooth, about 5 minutes.


Add red sauce and stir well. Add next 5 ingredients (Old Bay through Tabasco) and stir well. 

Add crab and cook 5 minutes. 

Add remaining ingredients and simmer for 20 minutes, until heated through.


Dish up + gobble. YUM! 


Here is the nutritional break down:

You are going to LOVE this soup!  


Thursday, September 4, 2014

Best Ever Cookie Bar Recipe: Chocolate Peanut Butter Cup S'more Bars

These are possibly the BEST Cookie Bars I have ever whipped out for my clan. I had to quickly plate some for a Mom's group I am in - and let me tell you there was some serious whining from my peeps. Usually they are pretty great about sharing but these delicious cookies had them smacking their lips and licking their fingers.

My friends in the Mom's group were raving and wanting the recipe. So, as great as this recipe would be for Back-to-School Treats, or School Lunches - it is just a much a treat for the Husbands and the Baker.

I hope you enjoy!


Chocolate Peanut Butter Cup S'more Bars Recipe - what could possibly be better? YUM!

-Simply Sublime

Monday, August 4, 2014

Lilikoi Bar Dessert Recipe: the sweet & tart taste of Hawaii


This is possibly my very most favorite dessert recipe EVER! The sweet citrus tartness of the Lilikoi paired with a hint of lemon and the perfect shortbread crust. So delicious! It is indeed like having a bite of Hawaii at home. In order to get fresh lilikoi you will either need to grow your own or... order them online.

This recipe is a combination of two different recipes - but the main part was followed from the recipe listed over at  Little Ferraro Kitchen.

Ingredients
    Crust
  • 1/2 lb butter, room temperature
  • 1/2 c sugar
  • 2 c flour, sifted (don't skip this)
  • 1/8 tsp kosher salt
  • Filling
  • 6 large eggs, at room temperature
  • 2 c sugar
  • 1 c fresh lilikoi juice (about 10-12 lilikoi)
  • 1 cup flour
  • 1 lemon, juice and zest
  • Glaze
  • 1/4 c water
  • 1/2 c granulated sugar
  • 1/4 c fresh lilikoi fruit juice  or use the Maguary Passion Fruit Concentrate
  • Juice of 1/4 lemon
Instructions
  1. First, make the lilikoi juice. Cut each fruit in half and scoop out the pulp and seeds..
  2.  Preheat the oven to 350 degrees F. 
  3. For the crust, cream the butter and sugar in mixer untily light with paddle attachment
  4. Combine the flour and salt and sift into the mixer on low, add to the butter mixture until just mixed.
  5. Form dough into ball with well floured hands. Flatten the dough and press it into a 9 by 13 by 2-inch baking sheet, building up a 1/2-inch edge on all sides.
  6. Chill in refrigerator for 30 minutes (or speed it up in the freezer for 15 minutes).
  7. For the filling, Whisk together the eggs, sugar, lilikoi juice (I like to keep the seeds in it), lemon zest, lemon juice, and flour.
  8. Pour over the crust and bake for 30-35 minutes, until the filling is set. Let cool.
  9. For the Lilikoi Glaze, boil water and sugar in a saucepan over medium heat for 5 minutes.
  10. Add passion fruit and lemon juice and boil for a further 3 minutes. It will boil rapidly and looks like it expanded.
  11. Remove from heat and allow to cool. It will turn into a thick and sugary passion fruit syrup.
  12. Allow to cool and drizzle over lilikoi bars
  13. Time to gobble them up!


-Simply Sublime

Friday, November 8, 2013

Let them EAT Cake: Best Ever Birthday Cake Recipe's & Easy DIY Decorating

When in doubt...ADD RIBBON!

recipe found at add a pinch and listed below

This was so EASY-PEASY...and I think it turned out super-duper cute. 

To be quite honest this happened by total accident. I was frosting the cake and thought it needed a little extra something. Oh yes indeed,  I do have all of the proper wilton cake decorating tubes, tips and ingredients to whip up something beautiful but... to be quite frank... I didn't want to put in the effort. Yeah, Mom of the year award here. But let me explain why before you go judging my lack of love effort here. I had been cooking up my daughter's favorite Italian Feast of bread sticks from scratch, Steak Gorgonzola and a Chicken Fettucine...ALL.DAY.LONG! This cake decorating was the final step, whew. 

So, as I was looking at this flatly frosted creation I decided to pull out that "easy" gun frosting shooter thingy (cake decorator) that can be used for making all food dishes pretty... a'hem. Yeah, right, maybe deviled eggs once a year on Easter.

My frosting was a bit soft but I was in a slam-jam hurry so, I slopped it into the tube and started shooting my cake around the rim with little star point slabby dots,  rather unsuccessfully. UGH! Okay...when in doubt ADD MORE! Lets run a little around the base of the cake. Eh...not much better. Somehow these little additions to the cake were actually drawing the eye to the imperfections and making it look even sadder. Atleast to me anyway. AND, I wanted a HAPPY cake. Yes, I said it ... a HAPPY CAKE! 

Then as if hit in the head by the most brilliant brainstorm ever I remembered the adorable bright hot pink polka dot ribbon in the the wrap drawer. Ahhh...... lovely, just lovely. That paired with the adorable long sparkler candles we picked up and the cake was complete. Pretty cute, huh?

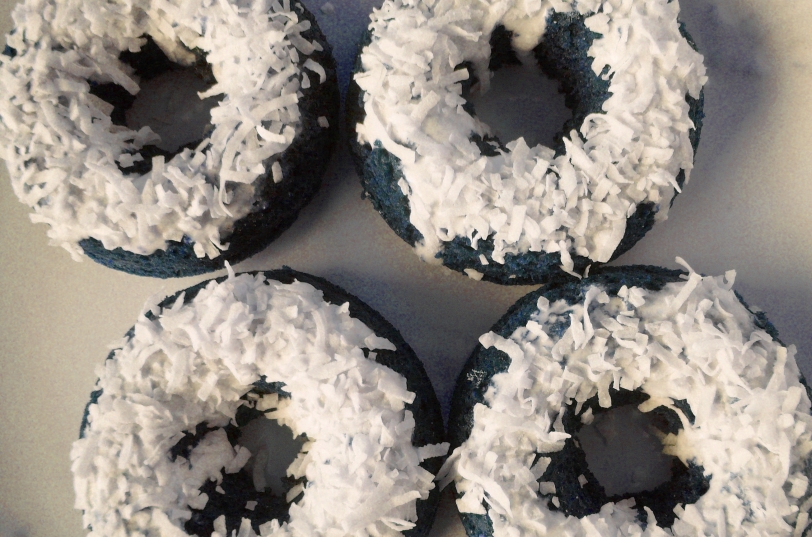
Now for this little beauty - Toasted Coconut Layer Cake with Coconut Butter Cream
Recipe at Food Network & Listed below

This Coconut Layer Cake photo and recipe has been waiting to blog about since July but just after I made it we were off to Africa. So, it has sat waiting oh-so-patiently for it's BIG reveal. 

This is one of my favorite Chef's {Bobby Flay's}recipes from a show called Throwdown. You can't really see my layers in the photo...but they are there. I should have turned my sliced cake layer over so it would show up better when cut. Lesson learned.

Some cakes just don't need much decorating, and this is one of those. The toasted coconut on it makes it simply divine...like eye candy at it's best. I guess for those unfortunate souls who don't like coconut it may lack some luster but we LOVE us some coconut in this fam!

The recipe on this one is a bit more involved with many more steps than the chocolate cake - but it required less decorating. Can I say I could have dove in the bowl and ate each of the layers before they were even assembled? Yes, it is all THAT GOOD! 

There is something so rewarding about whipping out a homemade Birthday Cake! I can't remember the last time we purchased a birthday cake - because my kids are always excited to dig into the home made YUM-FEST created for their special day. It really doesn't take a lot - but think about what it adds to your home. Your kiddos SEE you creating something to celebrate them, they also SMELL the deliciousness wafting throughout the rooms of your home in the process, and finally they get to TASTE the yumminess of what you made on their behalf. Can you picture it - it is like a Hallmark Greeting Card or Norman Rockwell scene right? Okay, okay - well, life isn't about perfection - it is about the enjoying the process. 

Just remember you don't have to be a professional baker or cake decorator to pull this off. Ribbon and fun candles can make all the difference. Some curled chocolate or toasted coconut can add a lil' extra yum factor and eye appeal. Just relax and have fun with it. Your kids will notice your deposit of love in action.

Okay here are the recipes: 
{or you can clink on the links under the photos and print them out}


Watch what God does, and then you do it, like children who learn proper behavior from their parents. Mostly what God does is love you. Keep company with him and learn a life of love. Observe how Christ loved us. His love was not cautious but extravagant. He didn’t love in order to get something from us but to give everything of himself to us. Love like that. -Eph. 5:2

-Simply Sublime

Saturday, March 16, 2013

Paleo Recipe Must Try's : Black Doughnuts, Raw Cheesecake, Morning Cakes, Cauliflower Fritters

AS I have been meandering some around pinterest some delightful dishes have been appearing. This put me on a quest of my own. I was on the hunt for unique, colorful and satisfying paleo dishes. Savory or sweet it did not matter. So,  I decided to post some  of the B E A U T I F U L and delicious paleo recipes I found  in this post.

I plan on trying them the scrumptious morsels within the next month, so I will let you know how tasty they really are.  I think you will quickly see why I picked this to try first.


In the Raw: Meyers Lemon & Vanilla Bean Cheesecake


{source: Roost}


Black Garlic Chocolate Doughnuts

Black Garlic Chocolate Donuts

{Source: GROKGRUB


Chicken Curry Tacos with Purple Slaw

chicken curry tacos_featured

{source: The Paleo Prize}


Double Coconut Muffins


Cauliflower Feta Fritters w/ Pomegranate

a pile of caulifritters

{Source: smitten kitchen}


Roasted Fennel & Orange Morning Cakes
(contains yogurt)


{Source: Roost}


If you have an equally appealing Paleo Recipe you think is a MUST try - please do share! 

-Simply Sublime